Wednesday, August 30, 2017

Lentils Stuffed Sweet Flatbreads/ Puran Poli/ Bobbatlu


These classic lentil stuffed flatbreads are popular Indian sweet which is made during festivals. They have different names in different parts of India, like the Puran Poli, bobbatlu, obbattu, holige, boli, poli and so on.
In this, the stuffing is filled with jaggery and gram dal which is boiled and then blended well till it thickens. The outer layer is either a wheat dough or a plain flour dough or we can mix both the wheat flour and plain flour and make dough out of it.

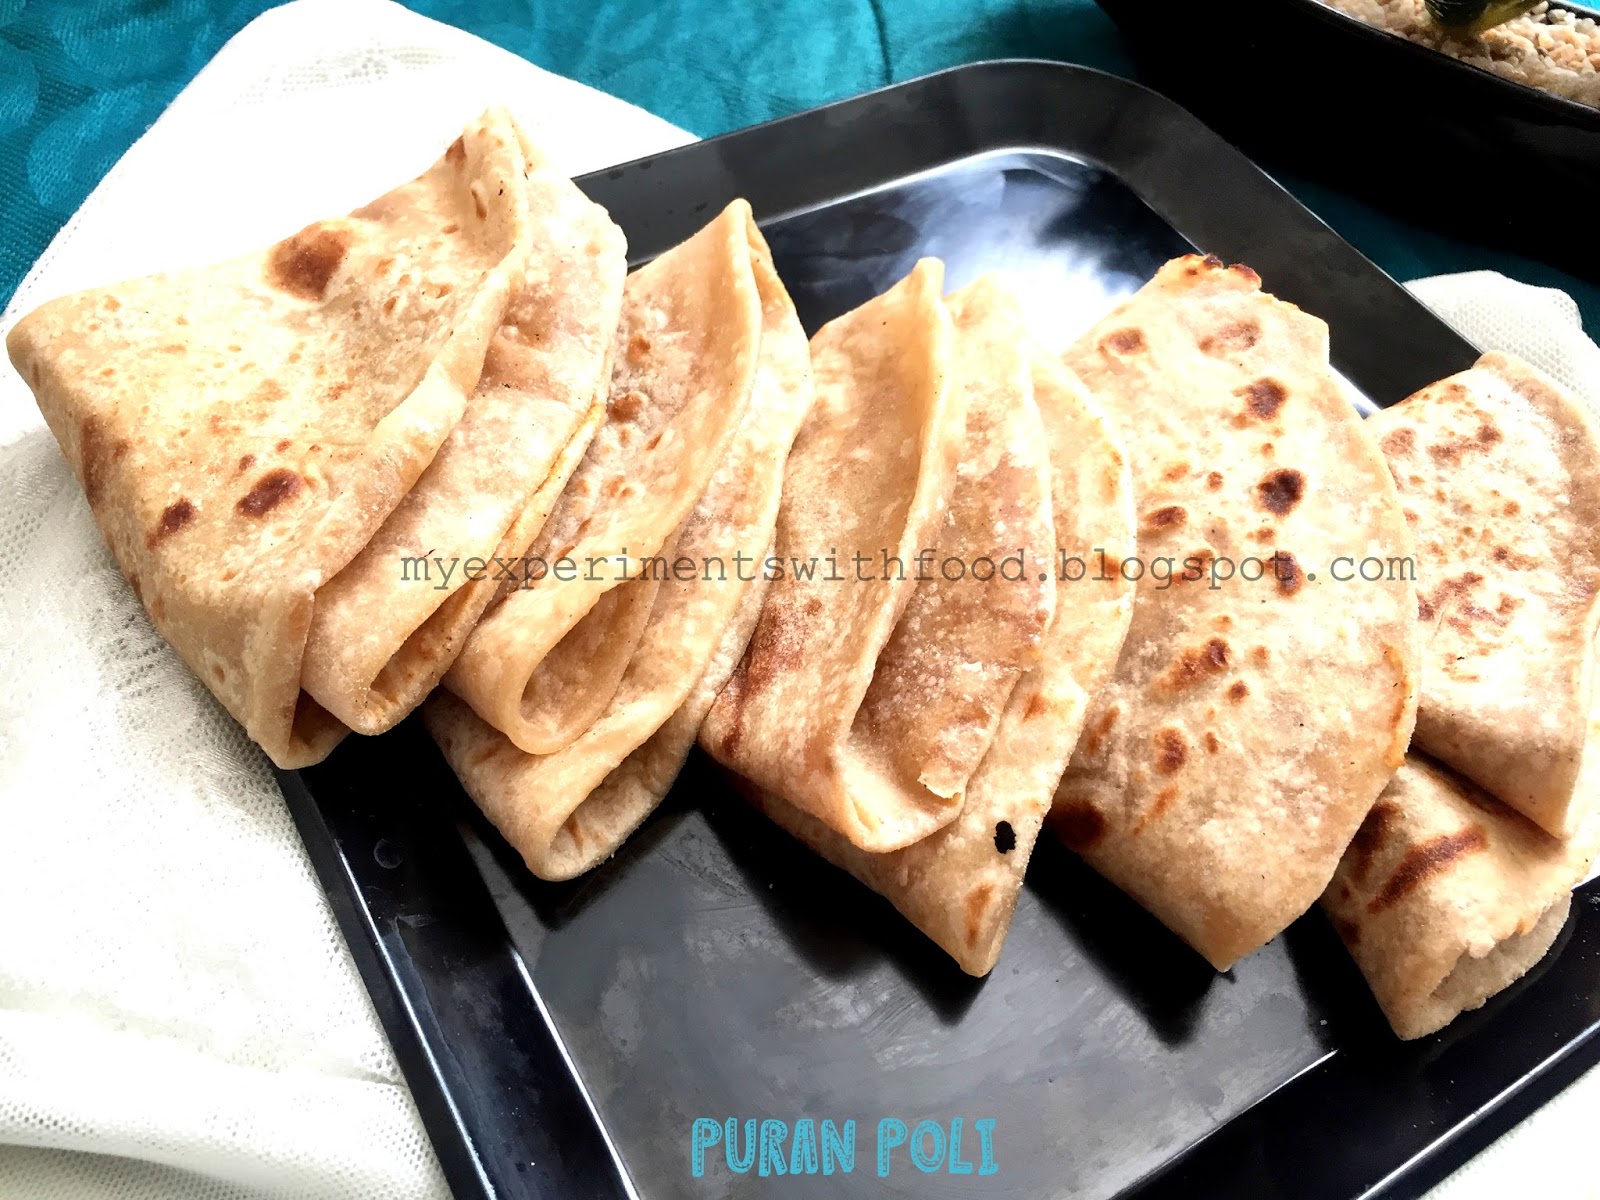
stuffed and rolled puran poli 


This is liked by my kids which are also very healthy and nutritious. This will be a good after school snack. You can roll and freeze them. When required thaw and cook.
I remember as a kid, when we were in Andhra, my neighbor's used to share us the festive dishes which were very delicious. Among them, I liked this Puran Poli a lot as it looked like a chapati and it tasted sweet. Try this out and let me know.


Ingredients:
For the dough:
  1. Wheat flour- 2 Cups
  2. Homemade Ghee- 1 tbsp+ 3 tbsp for smearing while cooking
  3. Salt- a pinch
  4. Water- required to knead the dough
  5. For the stuffing:
  6. Chana Dal/ Bengal Gram- 1 cup
  7. Jaggery- 1 Cup
  8. Cardamom powder- 1 tsp
  9. Ghee- 1tbsp
Method:

  1. Mix 1 tbsp of ghee, water, salt and the whole wheat flour together till it forms a soft, bouncy dough. Keep this aside till the stuffing is ready by covering the dough with a damp cloth.
  2. Meanwhile, for the stuffing, cook the washed and drained chana dal in a pressure cooker till it becomes soft and mushy.
  3. Strain the dal and let this cool for some time. Grind the cooled dal along with powdered jaggery and cardamom powder to a smooth consistency.
  4. Heat the ghee in a pan, add the ground dal- jaggery mixture. Stir well continuously on low flame, till the mixture starts leaving the edges of the pan and slowly it thickens.
  5. Switch off the pan and let this mixture cool. Make some medium sized balls from the mixture and keep this aside.
  6. Make balls out of the wheat dough and take a ball flatten it with your fingers and place dal- jaggery balls in the middle and close the dough to cover the stuffing.
  7. Gently roll this using a rolling pin, do not use pressure while rolling, or else the stuffing will come out.
  8. Heat a tawa and cook the above made Puran Poli y smearing little ghee in between. Flip on both the sides and when they are equally cooked and golden brown in color remove from stove and repeat with the remaining dough and the stuffing. Serve hot.


Tuesday, August 22, 2017

Healthy and Nutritious Mango- Avocado Salad


I got this salad recipe from one of my friends, who is a fitness expert from Bangalore, who posts healthy dishes on her Instagram and Facebook page. I liked this salad recipe as it required very fewer ingredients and a healthy salad will be ready within minutes.


This salad is so delicious that you will finish off in a go. The flavors and textures in this salad are perfectly balanced. I love the colors in this refreshing mango avocado salad. We like salads and most of the days for dinner I prepare a different variety of salads. Fortunately, my kids, even the younger one love these salads to the core. He likes broccoli in any form.


In this salad we have to choose ripe mangoes, or else they won’t taste perfect. Chop all the mangoes, avocado into bite sized pieces and mix all the ingredients and serve. We can also add different herbs and also if you want we can also add grilled prawns or salmon. This salad is so refreshing and very filling. Try this out and let me know.
Ingredients:
  1. Ripe Mangoes- 2 nos
  2. Avocado- 3 nos
  3. Onions- 2 nos
  4. Lemon Juice- 2 tbsp
  5. Olive Oil- 1 tbsp
  6. Salt- as required
  7. Pepper powder- 1 tbsp
Method:

  1. Chop the mangoes and avocado into square bite size pieces. Chop the onions to small pieces.
  2. Mix all the ingredients in a bowl, adjust the salt accordingly and serve as required.


Wednesday, August 16, 2017

Pizza Pinwheels


Soft, homemade dough with delicious toppings and melted cheese makes pizza a super tasty meal. Everyone from kids to adults will like this to the core as these pizza pinwheels are small, bite sized, appetizing pieces and will be vanished within seconds.


I usually make veggie or chicken pizza every alternate weekend for my daughter who is a big fan of Italian dishes like the pasta or pizza. Instead of buying from shops, I make them at home using homemade sauce or store bought as time permits. These Pizza pinwheels I made them for the first time when I saw these small cuties on a cookery show on some channel. I thought, next time instead of making a pizza, will try out making these pinwheels by rolling the pizza dough. I am thrilled with how well they turned out. These can be stored in the freezer without baking and when needed, thaw them and bake as required. Pizza Pinwheels are a super easy snack which can be served to kids as an after school snack or to guests.


More than 10 varieties of sauces are available. So you can experiment with any sauce of your choice. You can add your own choice of toppings and can make them in big or small sizes. If kids are involved in the making, they will enjoy thoroughly. Try this out and let me know.
Ingredients:
For Pizza Dough:
  1. All Purpose Flour- 2 Cups
  2. Yeast- 1 tbsp
  3. Sugar- 1 tbsp
  4. Salt- as required
  5. Warm water- ¾ Cup/ required enough to knead the dough
  6. Olive Oil- 2 tbsp
For Toppings:
  1. Capsicum- 2 nos
  2. Onions- 1 no
  3. Chicken Sausage- 7- 8 nos
  4. Mozzarella Cheese- 1 Cup
Method:

  1. Combine warm water and yeast and let it sit for some time until the yeast bubbles up.
  2. Add in oil, salt, and sugar. Mix the flour using the above-made yeast mixture slowly until it becomes a sticky dough.
  3. Continue mixing for another 5- 6 minutes and cover with a cling wrap and let it sit for 15- 20 minutes.
  4. Meanwhile preheat the oven to 350 degrees F. Chop the onions, capsicum and cut the sausage into small round discs.
  5. Flour the countertop and roll the dough into a large rectangle.
  6. Top it with the homemade pasta sauce and spread to all the corners. Spread the chopped onions, capsicum and sausage on top and cover with mozzarella cheese.
  7. Starting with one of the long sides of the rectangle, roll the dough tightly, pinching the seams to close at the end. Slice into 1” sections using a sharp knife.
  8. Place the pin wheels on a baking tray and bake for about 12- 15 minutes.Serve hot along with marinara or ketchup.


Thursday, August 10, 2017

Ummachi's (Mom’s) Coriander Mutton Curry


Mom’s mutton curry is one of my all time favorite dishes which I love to the core. As we grew up in Andhra, we add coriander leaves in almost all the dishes. I love the taste and aroma of these leaves, but my husband who is very picky in eating veggies doesn’t like these leaves at all and so I have to sneak these leaves in biryani by grinding them. I like to add them to all the curries but thinking about him I skip adding these.


When my mom makes these dishes she uses the homemade garam masala and the homemade ginger- garlic paste which she makes and stores. The scintillating aroma of these fried spices fills the house. She also had a kitchen garden, in which she grows almost all the vegetables possible. My dad who is very interested in gardening helps her. In between the vegetable plants, there used to be always these coriander plants which she grows by sowing seeds. She used to add them to curries. As she plucks the leaves, they will grow twice faster.The smell of these homegrown plants is awesome. I try different methods in gardening but some will grow and some won’t. I didn’t get her green thumb.
It’s time for the monthly challenge and this time it is to prepare something using meat and so here I am with my all time favorite dish, in which the main ingredient is coriander leaves, which I added by grinding along with tomatoes and sauteeing for almost 15- 20 minutes. In the recipe, I have added the leaves along with mutton pieces. Try this amazing dish and let me know.


Ingredients:
  1. Mutton- 2 lb
  2. Oil- 1 tbsp
  3. Onions (sliced)- 2 nos
  4. Tomatoes (sliced)- 2 nos
  5. Ginger and Garlic Paste- 2 tbsp
  6. Green Chillies- 4 no
  7. Grated Coconut- ½ Cup
  8. Khus Khus/ Poppy Seeds- 2 tbsp
  9. Red Chilli Powder- 1 tbsp
  10. Coriander Powder- 1 tbsp
  11. Turmeric Powder- 1 tsp
  12. Garam Masala Powder- 1 tsp
  13. Coriander/ Cilantro Leaves- ½ Cup
Method:

  1. Heat oil in a pan and stir fry the sliced onions. When they turn translucent add the ginger and garlic paste.
  2. Saute well till the raw smell disappears. Add the tomatoes, meanwhile, grind the coconut and poppy seeds by adding a little water till it becomes a paste.
  3. Add the red chili powder, turmeric powder, coriander powder and garam masala powder.
  4. Fry for a minute and add the ground coconut- poppy seed paste.
  5. Mix well and add the washed and drained mutton along with coriander leaves and required amount of salt.
  6. Pressure cook for about 5- 6 whistles or till the mutton gets cooked well. Enjoy with hot steamed rice.


Thursday, August 3, 2017

Homemade Clarified Butter/ Homemade Ghee


I have been absent from my little space for a couple of days, as I have been on a small vacation to Disneyland with my family. My 9-year-old daughter is a big fan of Disney princess and so before the school started we thought of visiting the place and I realized that more than my daughter I enjoyed the most. My childhood dream of seeing all the princess and visiting the famous castle all came true. I was super excited. Whole two days we thoroughly enjoyed the rides, meeting princesses and Disney characters, watching shows, fireworks and the musical fountain.


Back to today’s post. Many of my friends asked me to post this and so here I am with a recipe which will be very helpful to almost everyone who can have pure and aromatic clarified butter/ ghee at home.
As a kid, I saw my mom making ghee from scratch. It’s a long process of taking cream from boiled and cooled milk which is stored in a stainless steel container in the refrigerator till the container fills to the brim. She whips the cream well till it forms butter and melts the butter in a deep bottomed vessel to ghee. On the day of making ghee, the house will be filled with the nice aroma of clarified butter, which would stay the whole day.


This process looks tedious to me and as we buy skimmed milk, I cannot take the cream out of it. So I started buying ghee from stores, and when my parents visited me or when I go home, she gives me a big jar of homemade ghee. When we came to the US, I didn’t like the taste or the aroma of the store bought ghee, so decided to make this at home using unsalted butter, which I buy in a bulk for baking.
This process is so fast and we can make homemade ghee within no time. But nothing like moms. It is much better to make it at home, rather than spending so much for a small bottle. Try this out and let me know.
Ingredients:
  • Unsalted Butter- 8 sticks/ 4 Cups
Method:

  1. In a deep bottomed sauce pan heat the unsalted butter on a low- medium flame. It will start to melt and makes spluttering noise.
  2. A thin layer of foam will form on top. After about 10- 15 minutes on a low flame, switch off and keep this aside till slightly cooled.
  3. Strain this through a fine mesh sieve into clean bottles. It would be a nice golden yellow color.


Related Posts Plugin for WordPress, Blogger...